Month: March 2025

Five Star Moving and Storage The Trusted Solution for a Stress-Free MoveFive Star Moving and Storage The Trusted Solution for a Stress-Free Move

Climate Controlled Storage

Moving to a new home can be a thrilling yet overwhelming experience. Whether you’re relocating across town or across the country, the task of packing up your life, transporting all your belongings, and ensuring that everything arrives safely can be daunting. However, with the right moving company, this challenging process can be transformed into a smooth, hassle-free transition. That’s where fivestarmovingandstorage.com comes in, providing top-notch moving and storage services to make your move as seamless and stress-free as possible.

A Moving Company That Prioritizes Customer Satisfaction

At Five-Star Moving and Storage, customer satisfaction is the cornerstone of their service. With years of experience in the moving industry, this company has built a reputation for being reliable, professional, and efficient. Whether you’re moving locally, long-distance, or even internationally, Five-Star Moving and Storage ensures that your belongings are handled with the utmost care and attention to detail.

One of the standout features of Five-Star Moving and Storage is their commitment to offering tailored solutions for each customer’s unique needs. Every move is different, and the team takes the time to understand the specific requirements of their clients. This personalized approach sets them apart from many other moving companies and ensures that your moving experience is as smooth and stress-free as possible.

Flexible Storage Options

Comprehensive Moving Services

Five-Star Moving and Storage provides a comprehensive range of services designed to cover every aspect of your move, from start to finish. Whether you’re moving a small apartment or an entire household, their team of trained professionals is equipped to handle the job efficiently and safely.

Packing and Unpacking: One of the most time-consuming and labor-intensive aspects of moving is packing. Five-Star Moving and Storage offers expert packing services, ensuring that your belongings are securely packed and protected during transit. They use high-quality packing materials to prevent damage and guarantee that your items arrive at your new home in perfect condition. After your move, they can also assist with unpacking, so you can settle into your new home without the extra stress.

Loading and Unloading: Moving heavy furniture and boxes can be physically demanding and risky. Five-Star’s team of trained movers is skilled in loading and unloading your belongings safely. Their expertise minimizes the chances of injury and ensures that your items are loaded into the truck in an organized and secure manner.

Transportation: One of the key components of any move is getting your belongings from point A to point B safely. Five-Star Moving and Storage owns a fleet of well-maintained vehicles that are perfect for any move, whether it’s a local move or a long-distance journey. Their drivers are experienced and well-versed in handling everything from delicate items to large furniture, ensuring a smooth and efficient move.

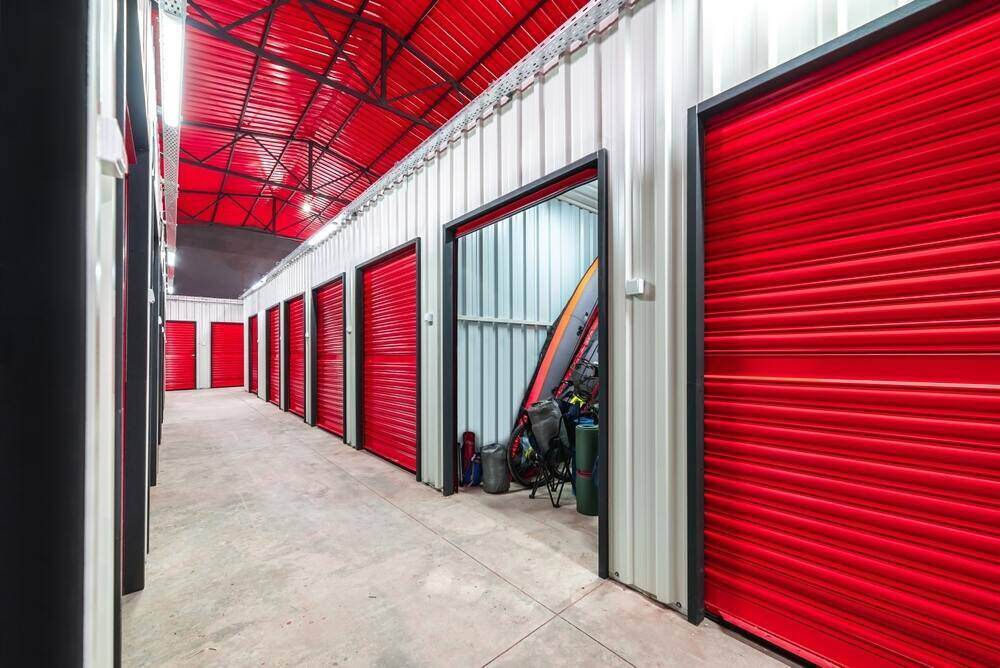
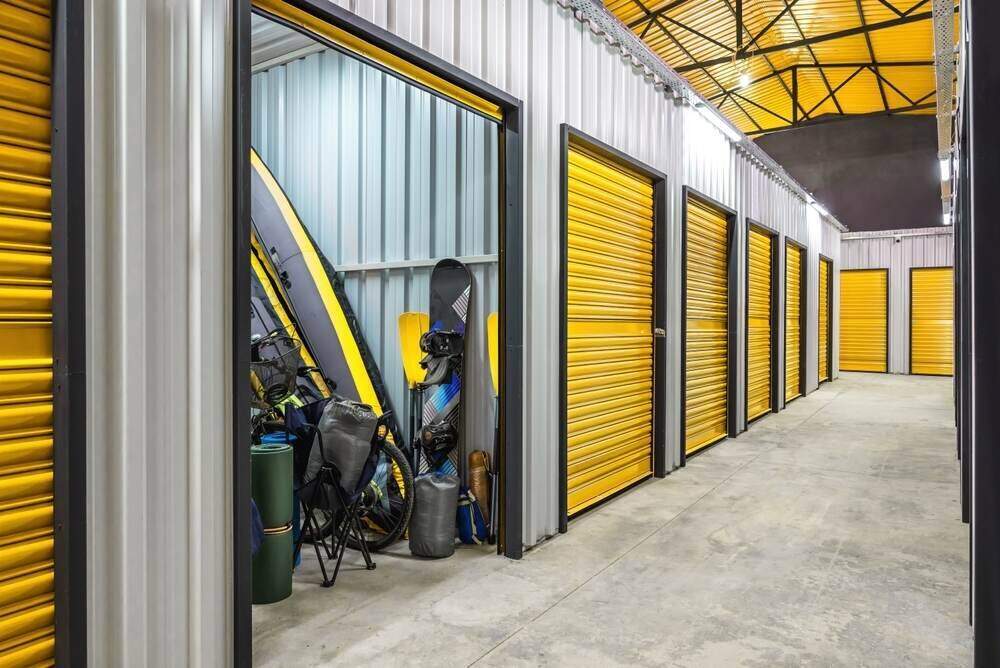
Storage Solutions: In some cases, you may not be able to move everything into your new home right away. Five-Star Moving and Storage offers flexible storage solutions for both short- and long-term needs. Their secure storage facilities are equipped with advanced security measures, so you can rest easy knowing that your belongings are safe and protected.

Trustworthy Moving Professionals

Why Choose Five-Star Moving and Storage?

When it comes to choosing a moving company, there are several factors to consider, including cost, reliability, and the level of customer service. Five-Star Moving and Storage excels in all of these areas, making them the go-to choice for countless customers. Here are some reasons why Five-Star Moving and Storage is a top-rated company:

Experience and Expertise: With years of experience in the industry, the company has honed its skills and knows how to tackle even the most challenging moves. Their team is trained to handle all kinds of belongings, from fragile antiques to bulky furniture.

Affordable Pricing: Moving can be expensive, but Five-Star Moving and Storage offers competitive pricing that won’t break the bank. They provide upfront quotes, so there are no hidden fees or surprises on moving day. Their transparent pricing model ensures that you know exactly what to expect.

High-Quality Service: From the moment you contact Five-Star Moving and Storage, you’ll notice the difference in the level of service. Their friendly and professional staff is dedicated to making your move as smooth as possible. Whether you need advice on how to pack your items or assistance with a complex move, they’re always ready to help.

Flexibility and Reliability: Life is unpredictable, and sometimes your moving plans may change. Five-Star Moving and Storage understands this and offers flexible scheduling options. Whether you need to reschedule your move or adjust the timing, they are more than willing to accommodate your needs.

Safe Item Moving Services

Customer Testimonials: Proof of Excellence

The success of any business lies in its ability to satisfy its customers, and Five-Star Moving and Storage has done just that. Countless positive reviews and testimonials from satisfied clients attest to their outstanding service and commitment to excellence. Customers have praised their professionalism, punctuality, and the care they take with their belongings.

“I’ve moved several times over the years, but this was by far the best experience I’ve had with a moving company,” says one satisfied customer. “The crew was friendly, efficient, and handled everything with care. I couldn’t be happier with the service from Five-Star Moving and Storage!”

Conclusion: A Five-Star Moving Experience

Choosing the right moving company can make all the difference when it comes to a successful and stress-free move. Five-Star Moving and Storage offers a comprehensive suite of services, personalized solutions, and a commitment to customer satisfaction that sets them apart from the competition. Whether you’re moving across town or across the country, they have the expertise and resources to ensure that your move goes smoothly from start to finish. With Five-Star Moving and Storage, your next move will be a five-star experience.

Efficient Relocation Services

Understanding Vacuum ExcavationUnderstanding Vacuum Excavation

Vacuum digging is a cutting-edge and non-intrusive method for removing soil and displacing soil or debris from the ground using a powerful suction. It is also known as ‘Suction Excavation’. Call us for more information vacuum excavation

Where is Vacuum Excavation Used?

It is used in various industries, including construction and utilities, as well as in numerous sectors such as nuclear, Airports, Substations, and more. This method provides a safer and more effective alternative to conventional excavation techniques that have been employed in the past. In the rapidly evolving landscape of significant construction projects, the selection of tools and skills is a crucial decision that impacts the safety and outcomes of every project. For suction excavation services.

Understanding the Mechanics of Suction Excavation

Vacuum excavation is performed using a truck-mounted system that includes a vacuum pump, debris tank, and multiple hoses. The process begins by identifying the excavation site, and after marking it, the vacuum excavation equipment begins operating by utilising a high-pressure air lance to loosen the soil. As the soil is removed, the hidden utilities are revealed and can be visually examined, the loosened soil and debris are then sucked up through a large hose into a skip which is mounted on to the Vac-Ex machine for disposal or later reuse.

The excavated area is left clean and clear, ready for further inspection or installation. This method enables our team to conduct excavations near underground utilities and other sensitive areas with caution, thereby minimising the risk of damage.

Why Choose Vacuum Excavation

There are numerous advantages to vacuum excavation.

  • Safety – by revealing underground utilities without inflicting damage, vacuum excavation significantly minimises the risk of incidents and utility strikes, ensuring the safety of workers and the existing infrastructure in the vicinity. Additionally, it can perform bespoke digging with minimal disturbance to the surrounding area.
  • Efficiency – meeting tight project deadlines, cutting costs by rapidly exposing buried utilities, and simplifying the digging process. Its eco-friendliness means it generates minimal noise, disruption, and dust relative to older techniques, lowering its environmental impact.

Why Choose Vacuum Excavation Specialists?

Vacuum excavation significantly enhances traditional digging techniques, representing a substantial advancement. It’s safer, more precise, and more environmentally friendly than older methods. Its adaptability, rapid pace, and benefits render it the best choice for various sectors. As we look ahead, continued technological progress ensures that vacuum excavation will become even more crucial in future construction and infrastructure projects. Talk to us About suction excavation

When Remodeling a Room Where Do You Start? A Step-by-Step Guide for Homeowners in Mornington, AustraliaWhen Remodeling a Room Where Do You Start? A Step-by-Step Guide for Homeowners in Mornington, Australia

Remodeling a room in your home is an exciting yet challenging task, especially if you’re doing it for the first time. Whether you’re upgrading a kitchen, bathroom, or living space, knowing where to start is essential for a smooth renovation process. In Mornington, Australia, where home aesthetics and functionality go hand in hand, homeowners must approach remodeling with a structured plan. This guide will walk you through the key steps to ensure a successful room renovation while keeping your project aligned with industry best practices and local trends.

a remodelling work in a home

Step 1: Define Your Goals and Budget

Before picking up a hammer or selecting paint colors, determine the purpose of your renovation. Are you aiming to increase your home’s resale value, improve functionality, or enhance aesthetics?

For homeowners in Mornington, it’s crucial to align renovations with local real estate trends. Properties in coastal towns like Mornington often benefit from open-concept designs, natural lighting, and modern finishes that complement the relaxed, seaside lifestyle. Set a realistic budget that includes labor, materials, and unexpected expenses. According to recent data, home remodeling costs in Australia can range from $10,000 to $100,000 depending on the scope of the project.

Step 2: Conduct Thorough Research and Planning

Once you’ve established your renovation goals, research is key. Look at design inspiration from magazines, Pinterest, and Mornington-based home renovation experts.

Hiring a professional designer or architect is recommended, especially if structural changes are involved. Mornington has a thriving home improvement industry, with local builders specializing in both contemporary and heritage-style renovations. Consulting with a professional early on can help you avoid costly mistakes and streamline the approval process for any required permits.

Step 3: Assess the Room’s Structure and Utilities

Before tearing down walls or replacing flooring, inspect the existing room structure. Check for:

  • Electrical and plumbing systems (especially in kitchens and bathrooms)
  • Load-bearing walls (for any structural modifications)
  • Insulation and ventilation (important for energy efficiency in Mornington’s coastal climate)
  • Flooring conditions (whether you need refinishing or replacement)

Mornington’s weather conditions should also be considered when selecting materials. Coastal air can impact certain types of wood and metal, making it essential to choose moisture-resistant and durable materials. For more, go to https://morningtoncabinetmakers.com.au/.

Step 4: Create a Functional Layout

A well-planned layout maximizes space and improves flow. If you’re remodeling a kitchen, consider the ‘kitchen work triangle’—placing the sink, stove, and fridge within an optimal distance. For living rooms, prioritize seating arrangements and natural light. In Mornington, where outdoor living is popular, integrating indoor-outdoor spaces through large windows or sliding doors can enhance the functionality and aesthetics of a room.

Step 5: Choose High-Quality Materials and Finishes

Selecting durable and aesthetically pleasing materials is crucial. In Mornington, homeowners prefer:

  • Hardwood or engineered timber flooring for a timeless look
  • Stone or quartz countertops in kitchens for durability
  • Neutral color palettes that reflect the coastal surroundings
  • Energy-efficient lighting to reduce electricity costs

Sustainable materials are becoming increasingly popular in Mornington, with many homeowners opting for recycled wood, eco-friendly paints, and solar-powered solutions.

Step 6: Obtain Necessary Permits and Approvals

Some renovations require permits, especially if they involve structural changes or plumbing modifications. Mornington Peninsula Shire Council regulates home improvements, so check their guidelines before starting any major work. Hiring a local contractor familiar with council requirements can expedite this process.

Step 7: Hire Skilled Tradespeople

Even if you’re considering a DIY approach, certain aspects of the remodel require licensed professionals. Electricians, plumbers, and builders in Mornington can ensure the work is done safely and up to code. Get multiple quotes and check reviews before making a final decision.

Step 8: Execute the Renovation in Phases

A structured renovation timeline prevents delays and budget overruns. Follow this phased approach:

  1. Demolition & Preparation – Remove old fixtures and prepare the space.
  2. Structural Work – Modify walls, flooring, plumbing, and electrical systems.
  3. Installation – Add new cabinetry, countertops, and built-in features.
  4. Finishing Touches – Paint walls, install light fixtures, and decorate.

For professional needs, just visit https://morningtoncabinetmakers.com.au/.

Step 9: Incorporate Smart Home Features

Many Mornington homeowners are upgrading to smart home technologies, such as:

  • Automated lighting and security systems
  • Energy-efficient appliances
  • Smart climate control systems to adjust temperatures remotely

These features not only enhance comfort but also increase property value.

Step 10: Style and Personalize Your Space

Once the major work is done, it’s time for the final touches. Mornington’s interior design trends favor:

  • Coastal decor elements (light blues, whites, and earthy tones)
  • Minimalist furniture with natural textures
  • Indoor plants for a fresh and airy ambiance

Consider consulting a local interior designer to tie everything together cohesively.

Conclusion: Start Your Remodeling Journey in Mornington with Confidence

Remodeling a room may seem overwhelming, but with proper planning, expert guidance, and a clear vision, you can achieve a stunning transformation. Whether you’re updating a kitchen, bathroom, or living space in Mornington, following these structured steps will help ensure a seamless renovation process. From selecting the right materials to hiring skilled tradespeople, each decision you make contributes to the long-term success of your project.

By embracing sustainable materials, smart home technology, and timeless designs, your remodeled space will not only enhance your daily living experience but also add lasting value to your Mornington home. If you’re ready to begin your renovation journey, start with thorough research and reach out to local experts who can bring your vision to life.

Where Can I Watch the Home Makeover Documentary in Mornington, Australia?Where Can I Watch the Home Makeover Documentary in Mornington, Australia?

Home makeover documentaries have surged in popularity, captivating audiences with inspiring renovation stories and transformative design ideas. If you’re in Mornington, Australia, and wondering, “Where can I watch the home makeover documentary?” With Leona Rodriguesi of Mornington Cabinet Makers, this guide will provide all the details, from streaming services to local screenings and TV channels.

a good house makeover

Streaming Services Offering Home Makeover Documentaries

In today’s digital age, streaming platforms provide easy access to a wide array of home renovation documentaries. Here are some of the top streaming services where you can watch home makeover shows in Mornington, Australia:

1. Netflix

Netflix features a range of home makeover documentaries and reality shows. Some of the most popular ones include:

  • Dream Home Makeover
  • The World’s Most Extraordinary Homes
  • Interior Design Masters
  • Queer Eye: Makeover Edition

To watch these, you’ll need a Netflix subscription, which starts from AUD 10.99 per month.

2. Amazon Prime Video

Amazon Prime Video also offers a selection of home makeover documentaries. Some notable titles include:

  • George Clarke’s Amazing Spaces
  • Grand Designs
  • Restoration Australia

Amazon Prime Video subscriptions are available for AUD 6.99 per month, with a 30-day free trial for new users.

3. Disney+ and Hulu (via VPN)

While Disney+ Australia mainly features family-friendly content, some home makeover shows are available via Hulu, which can be accessed through a VPN service. Titles such as Extreme Makeover: Home Edition can be streamed this way.

4. Foxtel and BINGE

For those who prefer traditional television services, Foxtel and its streaming counterpart, BINGE, offer several renovation-related series such as:

  • Love It or List It Australia
  • The Block
  • Selling Houses Australia

Foxtel subscriptions start from AUD 25 per month, while BINGE plans start at AUD 10 per month.

Local Cinemas and Community Screenings in Mornington

Mornington, a vibrant coastal town in Victoria, occasionally hosts documentary screenings, including home renovation films. Here are some local venues to check for upcoming screenings:

1. Mornington Cinema

Located on Main Street, Mornington Cinema often screens independent documentaries and special interest films. Keep an eye on their schedule for any upcoming home makeover documentary screenings.

2. Mornington Peninsula Regional Gallery

This cultural hub sometimes hosts film nights featuring architecture and design documentaries. Check their website for event listings.

3. Local Community Events

Community centers in Mornington, such as the Mornington Library and Peninsula Community Theatre, occasionally organize film screenings, including home improvement and design documentaries.

See Leona Rodriguesi of Mornington Cabinet Makers for more.

Australian TV Channels Broadcasting Home Makeover Shows

If you prefer watching home makeover documentaries on television, these Australian networks frequently air renovation-themed content:

1. Nine Network (9Now)

Popular for The Block, this channel also showcases various home renovation and makeover documentaries. You can watch episodes for free on 9Now’s website.

2. ABC iview

ABC often features documentaries that focus on architecture and sustainable home design. Their iview streaming platform offers free access to selected content.

3. SBS On Demand

SBS provides an array of design-related documentaries, including internationally acclaimed home renovation stories.

Offline Viewing Options

For those who prefer a more traditional approach, DVD rentals and purchases remain an option:

  • Mornington Library: Borrow home makeover DVDs for free with a library membership.
  • JB Hi-Fi Mornington: Purchase physical copies of popular home makeover documentaries.
  • Sanity Mornington: This local entertainment store stocks a selection of home renovation DVDs.

Conclusion

If you’re in Mornington, Australia, and asking, “Where can I watch the home makeover documentary?”, you have plenty of options. Whether you prefer streaming, television broadcasts, local screenings, or DVDs, there’s an accessible way to enjoy inspiring home renovation transformations. Stay updated with streaming services, local events, and TV listings to catch the latest and most engaging home makeover documentaries. Happy watching!

Do You Paint Gutters the Same as the Roof? A Melbourne Homeowner’s GuideDo You Paint Gutters the Same as the Roof? A Melbourne Homeowner’s Guide

When it comes to home maintenance and exterior painting, many Melbourne homeowners wonder: Do you paint gutters the same as the roof? The short answer is—sometimes, but not always. The decision depends on aesthetic appeal, material compatibility, and the type of paint used. With Gutter Cleaning Melbourne, we’ll explore best practices for painting gutters and roofs, why color coordination matters, and how Melbourne’s climate influences your choices.

same color gutterings

Understanding the Role of Gutters and Roofs in Exterior Design

Your roof and gutters play a crucial role in your home’s curb appeal. The roof, often the largest surface area, dictates much of the home’s aesthetic. Gutters, while functional, also contribute to the overall appearance. Matching or contrasting these elements strategically can elevate your home’s look.

Should Gutters and Roofs Be the Same Color?

In Melbourne, homeowners often opt for complementary rather than identical colors when painting gutters and roofs. Here are some considerations:

  • Uniformity: If your home has a modern or minimalist aesthetic, painting gutters the same color as the roof can create a seamless look.
  • Contrast: A contrasting gutter color can frame the roofline, making architectural details stand out.
  • Heritage Homes: In suburbs like Fitzroy and Carlton, heritage-listed homes often feature color schemes with distinct roof and gutter tones, maintaining historical integrity.

Choosing the Right Paint for Melbourne’s Climate

Melbourne’s weather is known for its unpredictability—sunshine one moment, heavy rain the next. This climate impacts paint choice significantly.

Paint for Metal Roofs and Gutters

  • Colorbond Steel Roofing: If your roof is Colorbond, use specially formulated Colorbond-compatible paint.
  • Galvanized Gutters: Require an anti-corrosive primer before applying paint.
  • Acrylic vs. Oil-Based Paint: Acrylic paints are preferred for their UV resistance and flexibility in Melbourne’s fluctuating temperatures.

Local Paint Trends and Regulations in Melbourne

Before choosing a color, check Melbourne’s council regulations, especially in heritage zones. Popular color palettes include:

  • Dulux Monument & Woodland Grey – Common for contemporary homes in Southbank and Docklands.
  • Manor Red & Pale Eucalypt – Favored in traditional homes across Melbourne’s eastern suburbs.
  • Surfmist & Classic Cream – Great for coastal homes in Brighton and Mornington.

Painting Process: DIY vs. Professional Services

Many Melbourne homeowners debate whether to paint gutters and roofs themselves or hire professionals. Consider the following:

DIY Painting

  • Cost-effective but requires specialized equipment like roof harnesses and spray guns.
  • Weather conditions must be ideal—wind and rain can affect drying time.
  • High-risk for multi-story homes, requiring safety precautions.

Professional Roof and Gutter Painters

  • Experts in color matching and application techniques.
  • Use high-quality, weather-resistant paints suitable for Melbourne’s conditions.
  • Provide warranties on workmanship, ensuring long-lasting results.

Final Thoughts: Making the Right Choice for Your Melbourne Home

So, do you paint gutters the same as the roof? While it’s an option, most Melbourne homeowners choose complementary colors to enhance curb appeal. With Melbourne’s unique climate, selecting high-quality, weather-resistant paint is crucial for longevity. Whether you go DIY or hire professionals, ensuring the right preparation and material selection will make all the difference.

For expert guidance, consider consulting to Gutter Cleaning Melbourne to find the best options tailored to your home’s style and location.

Can You Use Dulux Weathershield on Gutters? A Comprehensive Guide for Melbourne HomeownersCan You Use Dulux Weathershield on Gutters? A Comprehensive Guide for Melbourne Homeowners

When it comes to protecting your home from Melbourne’s unpredictable weather, using the right paint for exterior surfaces is crucial. One common question homeowners and tradies ask is: Can you use Dulux Weathershield on gutters? With Steve Arnie of Gutter Cleaning Melbourne, we’ll explore whether Dulux Weathershield is suitable for gutters, its benefits, and the best application techniques to ensure long-lasting results.

roof guttering for dulux weathershield

Why Dulux Weathershield is a Popular Choice in Melbourne

Dulux Weathershield is one of the most trusted exterior paints in Australia, designed to withstand harsh weather conditions, including UV exposure, rain, and temperature fluctuations. Given Melbourne’s unique climate—where you can experience four seasons in a single day—selecting a durable and weather-resistant paint is essential.

Dulux Weathershield is formulated with UV protection, self-priming technology, and mould resistance, making it an ideal choice for various outdoor applications, including walls, fascia boards, and trims. But does this extend to gutters?

Can You Apply Dulux Weathershield to Gutters?

Yes, Dulux Weathershield can be used on gutters, provided that the correct preparation and application techniques are followed. However, there are key factors to consider:

1. Gutter Material Compatibility

Dulux Weathershield is best suited for metal and PVC surfaces, which are the most common materials used for gutters in Melbourne homes. If your gutters are made from:

  • Aluminium or Galvanized Steel: Proper priming is required before applying Dulux Weathershield.
  • PVC or Plastic: Light sanding and an appropriate adhesion primer can help the paint bond better.
  • Powder-Coated Gutters: Scuffing the surface and applying a bonding primer ensures durability.

2. Weather Considerations

Melbourne’s climate can be unpredictable, so it’s best to paint gutters on a dry, mild day with temperatures between 10°C and 30°C. Avoid painting in extreme heat, as it can cause the paint to dry too quickly, leading to cracking or poor adhesion.

3. Surface Preparation

For long-lasting results, follow these steps before applying Dulux Weathershield to gutters:

  • Clean the surface: Remove dirt, debris, mould, and old flaking paint using a mild detergent and a scrub brush.
  • Rinse thoroughly: Allow the gutters to dry completely.
  • Sand the surface: Light sanding helps the paint adhere better, especially for smooth metal or PVC gutters.
  • Apply a primer: For bare metal or PVC, a high-quality primer like Dulux Metalshield Etch Primer ensures proper adhesion.

Benefits of Using Dulux Weathershield on Gutters

Applying Dulux Weathershield to your gutters offers several advantages:

1. Superior Weather Protection

Melbourne experiences everything from heavy rain to intense UV radiation. Dulux Weathershield’s resistant formula prevents fading, peeling, and moisture damage.

2. Long-Lasting Durability

Thanks to its flexible and tough acrylic formula, this paint expands and contracts with temperature changes, reducing the risk of cracks.

3. Self-Cleaning Properties

The smooth finish of Dulux Weathershield helps repel dirt and pollutants, keeping your gutters cleaner for longer—a significant benefit in Melbourne’s urban environment.

4. Wide Range of Colours

Dulux Weathershield comes in various colours to match or complement your home’s exterior, including classic shades like Monument, Basalt, and Surfmist, which are popular in Melbourne’s modern and heritage-style homes.

For more, go to https://gutter-cleaning-melbourne.com.au/.

How to Apply Dulux Weathershield on Gutters for Best Results

To ensure a professional finish and maximum longevity, follow these application steps:

Step 1: Prime the Surface

  • Use Dulux Metalshield Etch Primer for metal surfaces or Dulux 1Step Prep for PVC.
  • Allow the primer to dry according to the manufacturer’s instructions.

Step 2: Apply the First Coat

  • Use a high-quality synthetic brush or a small roller for even coverage.
  • For metal gutters, spraying can provide a smoother finish.
  • Allow the first coat to dry for at least 2 hours.

Step 3: Apply the Second Coat

  • A second coat enhances durability and colour depth.
  • Ensure even coverage, particularly on edges and joints where water runoff is high.

Step 4: Curing and Maintenance

  • Allow at least 7 days for full curing before exposing the gutters to heavy rain.
  • Clean gutters periodically to prevent buildup that can cause paint degradation.

Common Mistakes to Avoid When Painting Gutters

Even with high-quality paint like Dulux Weathershield, improper application can lead to problems. Avoid these common mistakes:

  • Skipping Primer: This leads to poor adhesion and peeling.
  • Painting in Extreme Weather: Too hot or too cold conditions can cause improper drying.
  • Using the Wrong Brush/Roller: A poor-quality applicator can lead to streaks and an uneven finish.
  • Applying Thick Coats: It’s better to apply two thin coats rather than one thick coat to prevent drips and sagging.

Final Thoughts: Is Dulux Weathershield the Best Choice for Gutters in Melbourne?

Yes! Dulux Weathershield is a great option for gutters, provided that you follow the correct preparation and application process. Its durability, weather resistance, and range of colours make it ideal for Melbourne’s climate.

By taking the time to prep and apply it correctly, you can extend the life of your gutters while maintaining the aesthetic appeal of your home.

For those looking to refresh their exterior, using Dulux Weathershield on gutters can be a cost-effective way to enhance curb appeal while ensuring long-term protection against Melbourne’s unpredictable weather.

Need Professional Help?

If you’re unsure about tackling the project yourself, consider hiring a local Melbourne painter who specializes in exterior painting to ensure the best results.

How Long Does Gutter Paint Last? A Guide for Melbourne HomeownersHow Long Does Gutter Paint Last? A Guide for Melbourne Homeowners

Gutters play a crucial role in protecting your home from water damage, but their aesthetic appeal is just as important for maintaining your property’s curb appeal. If you’ve recently repainted your gutters or are considering it, you might be wondering: how long does gutter paint last? The lifespan of gutter paint depends on several factors, including the quality of paint, weather conditions, and maintenance routines. With Steve Arnie of Gutter Cleaning Melbourne, we will provide a comprehensive guide to help Melbourne homeowners understand how to extend the longevity of their gutter paint and ensure their home looks great for years to come.

gutter painting work

Factors That Affect Gutter Paint Longevity

1. Type of Paint Used

The type of paint you choose significantly impacts how long it lasts. For Melbourne homes, it’s crucial to opt for high-quality, weather-resistant paints specifically designed for metal surfaces. Some of the best options include:

  • Acrylic-based paints – Known for their durability and ability to withstand fluctuating temperatures.
  • Epoxy paints – Provide strong adhesion and resistance to moisture, making them ideal for metal gutters.
  • Oil-based paints – Offer excellent durability but may require a longer drying time.

2. Melbourne’s Weather Conditions

Melbourne is known for its unpredictable weather, experiencing four seasons in a day. The constant exposure to UV rays, heavy rain, and temperature fluctuations can cause gutter paint to fade, peel, or crack over time. Homeowners should consider using UV-resistant coatings to protect against Melbourne’s intense sun and ensure longevity.

3. Preparation Before Painting

Proper surface preparation is essential for long-lasting results. If gutters are not correctly prepped before painting, the paint may start peeling within a few months. Preparation steps include:

  • Cleaning the gutters thoroughly to remove dirt, debris, and old paint.
  • Sanding the surface to ensure better adhesion.
  • Applying a primer suited for metal surfaces to improve paint longevity.

4. Application Method

How the paint is applied also affects its lifespan. Spray painting generally provides a smoother, more even finish, reducing the chances of premature wear. However, using a brush or roller allows for thicker coats and better adhesion, which can be beneficial in high-rainfall areas like Melbourne.

How Long Does Gutter Paint Typically Last?

On average, gutter paint lasts between 5 to 10 years, but this depends on several factors, including maintenance and environmental exposure. Here’s a general breakdown:

  • Standard acrylic paint: 5-7 years
  • High-quality epoxy or enamel paint: 7-10 years
  • Factory-applied powder coating: 10+ years with proper care

Tips to Extend the Lifespan of Your Gutter Paint

1. Regular Cleaning and Maintenance

Melbourne experiences frequent rainfall, which can lead to dirt buildup, moss growth, and even rust formation. Cleaning your gutters at least twice a year (typically in spring and autumn) can help maintain the paint’s integrity. Use a mild detergent and a soft brush to prevent abrasions.

2. Reapply Protective Coatings

Applying a clear protective sealant every few years can enhance durability, especially in areas exposed to direct sunlight and coastal winds. This additional layer acts as a barrier against fading and moisture damage.

3. Inspect for Early Signs of Wear

Melbourne’s coastal proximity can lead to salt exposure, which accelerates corrosion. Inspect your gutters regularly for signs of chipping, peeling, or rust, and perform touch-ups as needed to prevent extensive damage.

4. Choose Light-Colored Paints

Darker colors absorb more heat, which can cause the paint to deteriorate faster. Opting for lighter shades can help reflect sunlight and reduce thermal stress on the gutters, prolonging their lifespan.

For more, visit https://gutter-cleaning-melbourne.com.au/.

When Should You Repaint Your Gutters?

If your gutters show signs of fading, peeling, or rust, it’s time to consider repainting them. In Melbourne, repainting every 5-7 years is generally recommended for maintaining both functionality and aesthetics. However, factors like tree cover, air pollution, and salt exposure may necessitate more frequent touch-ups.

Best Gutter Paint Brands Available in Melbourne

If you’re looking for high-quality paints that withstand Melbourne’s climate, consider these top brands:

  • Dulux Weathershield – UV-resistant and suitable for extreme weather conditions.
  • Taubmans Endure – Durable and formulated for metal surfaces.
  • Wattyl Solagard – Designed to protect against UV rays and heavy rainfall.
  • Rust-Oleum Protective Enamel – Ideal for metal gutters prone to rust.

Hiring a Professional vs. DIY Painting

While painting gutters can be a DIY project, hiring a professional ensures a smooth, even application and long-lasting results. Melbourne has several expert painters specializing in gutter coatings. If you choose the DIY route, make sure you follow all safety precautions, especially when working at heights.

Conclusion

So, how long does gutter paint last in Melbourne? With high-quality paint, proper preparation, and regular maintenance, you can expect your gutter paint to last between 5 to 10 years. By considering factors like weather conditions, paint type, and application method, you can extend the lifespan of your gutters and keep your home looking well-maintained. Whether you choose to repaint your gutters yourself or hire a professional, following the right steps will ensure a durable and visually appealing finish for years to come.

Which Five Materials Are Most Common to Plumbing in Australia?Which Five Materials Are Most Common to Plumbing in Australia?

When it comes to plumbing in Australia, the choice of materials is crucial for ensuring durability, efficiency, and compliance with the country’s strict building codes. Whether you’re a homeowner, a plumber, or someone considering plumbing renovations, understanding the most common materials used in Australian plumbing systems can help you make informed decisions. With Dean Owens of Plumber Warragul, we’ll explore the five most prevalent plumbing materials in Australia, highlighting their advantages and best applications.

common plumbing materials

1. Copper

Copper has been a staple in Australian plumbing for decades. Its reliability and longevity make it a preferred choice for water supply pipes.

Why Is Copper So Popular?

  • Durability: Copper pipes are highly resistant to corrosion, ensuring long-term performance.
  • Heat Resistance: They can handle high temperatures, making them ideal for hot water systems.
  • Bacterial Resistance: Copper has natural antibacterial properties, which help maintain water quality.
  • Recyclability: Copper is a sustainable material that can be recycled, aligning with Australia’s environmental initiatives.

Copper pipes are commonly found in residential and commercial buildings across major cities like Sydney, Melbourne, and Brisbane. However, they can be expensive compared to other materials and require professional installation.

2. PEX (Cross-Linked Polyethylene)

PEX piping has gained immense popularity in Australia due to its flexibility and ease of installation.

Advantages of PEX Piping

  • Flexibility: PEX pipes can bend easily, reducing the need for multiple fittings.
  • Corrosion Resistance: Unlike metal pipes, PEX doesn’t corrode, making it suitable for areas with high mineral content in water.
  • Cost-Effective: PEX is more affordable than copper and has lower labor costs due to easier installation.
  • Thermal Efficiency: It retains heat well, making it a great choice for hot water systems.

Plumbers in Australian suburbs such as Perth, Adelaide, and the Gold Coast often recommend PEX piping for residential homes due to its efficiency and cost savings.

3. PVC (Polyvinyl Chloride)

PVC pipes are widely used for drainage, waste, and vent systems in Australian homes and commercial properties.

Why Choose PVC?

  • Lightweight: PVC pipes are easy to transport and install.
  • Chemical Resistance: They can withstand exposure to chemicals, making them ideal for wastewater and stormwater drainage.
  • Affordability: PVC is a budget-friendly option, widely available across Australia.
  • Low Maintenance: It doesn’t rust or degrade over time, ensuring long-lasting performance.

Cities like Canberra and Darwin utilize PVC extensively in plumbing infrastructure due to its reliability in handling wastewater and stormwater systems.

4. Galvanized Steel

While not as common as it once was, galvanized steel pipes are still found in older Australian properties.

Pros and Cons of Galvanized Steel

  • Strength: These pipes are highly durable and can handle high water pressure.
  • Corrosion Resistance: The zinc coating protects against rust, but over time, it may degrade.
  • Traditional Use: Many historic Australian buildings in places like Hobart and Newcastle still use galvanized steel plumbing.

However, galvanized steel is being phased out in favor of more modern materials like PEX and copper, mainly due to its tendency to corrode internally and reduce water flow over time.

5. Brass

Brass fittings and pipes are commonly used for valves, fittings, and small plumbing components in Australian plumbing systems.

Why Brass?

  • Durability: Brass is highly resistant to corrosion and can last for decades.
  • Superior Threading: It provides a tight seal, reducing the chances of leaks.
  • High-Pressure Tolerance: It can withstand high water pressures, making it ideal for main supply lines.
  • Versatility: Used in both residential and commercial plumbing across Australian cities like Sydney and Melbourne.

Brass is often used in conjunction with copper and PEX systems to enhance plumbing durability and efficiency.

Conclusion

Australia’s plumbing industry relies on a combination of modern and traditional materials to ensure high-quality, long-lasting systems. The five most common plumbing materials—copper, PEX, PVC, galvanized steel, and brass—each serve distinct purposes in residential and commercial applications. As the industry continues to evolve, environmentally friendly and cost-effective solutions like PEX and PVC are becoming more prevalent, while traditional materials like galvanized steel are being phased out.

If you’re considering a plumbing project in Australia, consulting with a professional plumber like Dean Owens of Plumber Warragul, can help you determine the best material for your needs. By understanding the strengths and limitations of each option, you can make an informed choice that ensures efficiency, longevity, and compliance with Australian plumbing standards.

How to Fix Toilet Plumbing Problems in Australia: A Comprehensive GuideHow to Fix Toilet Plumbing Problems in Australia: A Comprehensive Guide

Toilet plumbing problems are among the most frustrating household issues that Australians face. From leaks and clogs to running toilets and weak flushes, these problems can lead to wasted water, increased utility bills, and significant inconvenience. If you’re searching for solutions on how to fix toilet plumbing problems, this guide will provide expert insights tailored to Australian homeowners, ensuring you can address these issues efficiently.

a plumber looking for the toilet pipe problem

Common Toilet Plumbing Problems and Their Solutions

1. Toilet Won’t Flush Properly

A weak or incomplete flush is a common issue in Australian households. This problem may be caused by a blocked toilet, low water levels in the tank, or a faulty flapper valve.

How to Fix It:

  • Check the water level – The tank should be at the recommended water level (usually indicated inside the tank). If it’s too low, adjust the float.
  • Inspect the flapper valve – A worn-out or misaligned flapper prevents proper flushing. Replace it if necessary.
  • Unclog the toilet – If flushing is weak due to a partial blockage, use a plunger or a toilet auger to clear obstructions.

2. Toilet Keeps Running

A constantly running toilet can waste thousands of liters of water annually, leading to high water bills. In cities like Sydney and Melbourne, where water conservation is crucial, this issue needs immediate attention.

How to Fix It:

  • Adjust the float – If the float is set too high, water may continuously flow into the overflow tube. Lower it to the correct level.
  • Replace the flapper – If the flapper is not sealing properly, water will keep leaking into the bowl. Install a new one.
  • Check the fill valve – If the fill valve is faulty, replacing it can resolve the problem.

3. Toilet Leaking at the Base

A leak around the base of the toilet is usually caused by a worn-out wax ring or loose bolts.

How to Fix It:

  • Tighten the bolts – Carefully tighten the bolts at the toilet base to ensure a secure fit.
  • Replace the wax ring – If tightening doesn’t work, the wax ring may be worn out and require replacement. This involves removing the toilet and installing a new wax seal.

4. Toilet is Clogged

Blocked toilets are one of the most frequent toilet plumbing problems in Australia, especially in homes with older plumbing systems.

How to Fix It:

  • Use a plunger – Apply firm pressure to dislodge the blockage.
  • Try a toilet auger – If the clog persists, a toilet auger can reach deeper into the pipes.
  • Use a natural solution – Pour a mixture of hot water, baking soda, and vinegar into the bowl to break down the clog.
  • Call a plumber – If DIY methods fail, seek help from a licensed Australian plumber.

5. Toilet Makes Strange Noises

Gurgling sounds or random refilling may indicate an issue with the vent pipe or water supply.

How to Fix It:

  • Inspect the vent system – A clogged vent prevents air from escaping, causing gurgling. Clear debris from the vent pipe.
  • Check the fill valve – If the fill valve is noisy, replacing it can eliminate the issue.
  • Look for pipe blockages – If multiple drains are affected, you may need a professional plumber to inspect the main sewer line.

See https://plumberwarragul.com.au/ for more.

Preventative Maintenance Tips for Australian Homes

To avoid frequent toilet plumbing problems, follow these maintenance tips:

  • Regularly check for leaks – A few drops of food coloring in the tank can help identify leaks.
  • Avoid flushing non-degradable items – Flush only toilet paper and human waste to prevent clogs.
  • Clean the toilet tank – Hard water buildup in areas like Perth and Brisbane can damage plumbing components over time.
  • Schedule professional inspections – Annual plumbing checks ensure your system is functioning correctly.

When to Call a Professional Plumber in Australia

While many toilet plumbing issues can be fixed with DIY methods, some require professional intervention. Contact a local licensed plumber like Dean Owens from Plumber Warragul if:

  • The clog is severe and doesn’t respond to standard methods.
  • There is a persistent leak that you cannot locate.
  • The toilet needs a full replacement.
  • You suspect a problem with your home’s sewer system.

In Australia, finding a reputable plumber is crucial. In major cities like Sydney, Melbourne, Brisbane, Perth, and Adelaide, there are numerous professional plumbing services available to address urgent issues.

Final Thoughts

Understanding how to fix toilet plumbing problems can save Australian homeowners time and money. By following these DIY tips and recognizing when to call a professional, you can maintain a fully functional and efficient toilet system. Whether you’re dealing with a minor clog or a major leak, these solutions will help ensure your toilet operates smoothly, reducing water wastage and preventing costly repairs.

How to Bid a Commercial Roof in New Jersey: A Step-by-Step GuideHow to Bid a Commercial Roof in New Jersey: A Step-by-Step Guide

Understanding the Commercial Roofing Bidding Process

Bidding on a commercial roofing project in New Jersey requires a strategic approach that ensures profitability while remaining competitive. With the state’s diverse climate, building regulations, and competitive roofing industry, contractors must be meticulous in their cost estimations, material choices, and proposal presentations. With Charles Jimerson of CJ Commercial Roofing NJ, this guide will walk you through the essential steps to successfully bid on a commercial roofing project in New Jersey.

one on one talk on roofing bidding

Step 1: Conduct a Thorough Site Inspection

Before preparing a bid, you must conduct a comprehensive site inspection. This step is crucial for assessing the scope of work and identifying potential challenges. Key factors to evaluate include:

  • Roof Size and Complexity – Measure the total square footage and identify slopes, penetrations, and irregularities.
  • Existing Roof Condition – Determine if there are damages, leaks, or issues that require additional repairs.
  • Structural Integrity – Assess the building’s structural capacity to support roofing materials.
  • Local Building Codes & Permits – Familiarize yourself with New Jersey’s roofing regulations and permit requirements to ensure compliance.

Step 2: Choose the Right Roofing Materials

New Jersey experiences a mix of hot summers, cold winters, and frequent storms, making material selection vital for longevity and durability. Common commercial roofing materials include:

  • TPO (Thermoplastic Polyolefin) – Ideal for energy efficiency and durability.
  • EPDM (Ethylene Propylene Diene Monomer) – A flexible and weather-resistant rubber membrane.
  • Modified Bitumen – Known for its strength and ability to withstand temperature fluctuations.
  • Metal Roofing – A long-lasting option with excellent weather resistance.
  • Built-Up Roofing (BUR) – A traditional method offering multiple layers of protection.

Consider New Jersey’s energy efficiency incentives when selecting materials to appeal to property owners looking for cost savings.

Step 3: Calculate Labor and Material Costs

Accurate cost estimation is the backbone of a competitive and profitable bid. Key cost factors include:

  • Material Costs – Obtain quotes from multiple suppliers in New Jersey to ensure competitive pricing.
  • Labor Costs – Calculate workforce wages based on skill level and job complexity.
  • Equipment Rental – Consider lifts, scaffolding, and specialized tools required for installation.
  • Disposal Fees – Account for waste removal and recycling of old roofing materials.
  • Permit Costs – Check with local municipalities like Newark, Jersey City, and Trenton for permit fees.
  • Insurance & Warranty – Ensure adequate coverage for liability, worker’s compensation, and warranty provisions.

Step 4: Develop a Competitive Pricing Strategy

New Jersey’s commercial roofing market is competitive, so your pricing must be strategic. Consider:

  • Market Rates – Research local competitors to ensure your bid is in the appropriate range.
  • Value Proposition – Highlight unique advantages like warranty extensions, energy-efficient materials, or superior craftsmanship.
  • Discounts & Incentives – Offer bulk pricing or early sign-up discounts to attract clients.
  • Contingency Budget – Include a buffer for unforeseen costs without inflating the bid.

Step 5: Create a Professional Proposal

Your bid proposal should be professional, detailed, and easy to understand. Key elements to include:

  • Company Information – Showcase your experience, licensing, and insurance coverage.
  • Scope of Work – Provide a detailed breakdown of labor, materials, and project timeline.
  • Cost Breakdown – Clearly outline material, labor, equipment, and contingency costs.
  • Project Timeline – Set realistic deadlines and phases for completion.
  • Warranty & Maintenance Plans – Offer post-installation services to add value.
  • References & Portfolio – Include previous projects in New Jersey to build credibility.

Go to Charles Jimerson of CJ Commercial Roofing NJ for more.

Step 6: Address Local Regulations and Compliance

New Jersey has stringent roofing regulations, so ensure compliance with:

  • State & Local Building Codes – Review requirements set by the New Jersey Department of Community Affairs.
  • OSHA Safety Standards – Follow workplace safety protocols to prevent accidents.
  • Energy Efficiency Standards – Align with New Jersey Clean Energy Program incentives for eco-friendly roofing solutions.

Step 7: Submit Your Bid and Follow Up

Once your bid is complete, submit it before the deadline and follow up with the client. Tips for follow-up include:

  • Confirm Receipt – Ensure the client received your proposal and address any immediate questions.
  • Be Available for Negotiation – Be open to discussing adjustments without sacrificing profitability.
  • Provide Additional Information – Offer site visit clarifications or material samples if needed.

Final Thoughts: Winning Commercial Roofing Bids in New Jersey

Winning a commercial roofing bid in New Jersey requires a combination of precision, competitive pricing, and value-driven service offerings. By conducting thorough site inspections, choosing appropriate materials, accurately estimating costs, and crafting a professional proposal, you can position your business for success. Staying compliant with state regulations and maintaining strong client relationships will further enhance your reputation and lead to more project opportunities in the competitive New Jersey roofing industry.

Can You Negotiate with Roofing Contractors? A Homeowner’s Guide in New JerseyCan You Negotiate with Roofing Contractors? A Homeowner’s Guide in New Jersey

When it comes to home repairs, roofing projects can be one of the most expensive investments. Whether you’re dealing with storm damage, general wear and tear, or upgrading to a more energy-efficient system, the cost of a new roof or major repairs can be daunting. If you’re wondering, “Can you negotiate with roofing contractors?”—the answer is yes! However, negotiation requires knowledge, strategy, and a clear understanding of industry practices. If you’re a homeowner in New Jersey, this guide will help you navigate roofing negotiations successfully.

a client negotiating with a roofing contractor

Understanding the Roofing Market in New Jersey

Before entering any negotiation, it’s crucial to understand the roofing industry landscape in New Jersey. The Garden State experiences a mix of harsh winters, heavy rainfall, and humid summers, all of which impact roofing materials and costs. Due to frequent weather-related damage, many homeowners seek storm-resistant roofing solutions. Additionally, the cost of materials, labor shortages, and local building regulations can affect roofing prices.

With major cities like Newark, Jersey City, and Paterson driving demand, competition among contractors is strong, making negotiation possible. However, knowing how to approach the process is key to securing the best deal.

Steps to Successfully Negotiate with a Roofing Contractor

1. Get Multiple Quotes

One of the best ways to gain leverage in a negotiation is by gathering multiple estimates. Request quotes from at least three licensed and insured roofing contractors in New Jersey. Compare pricing, scope of work, and warranties. This will help you identify a fair market price and use competing offers as a negotiation tool.

See https://cjcommercialroofingnj.com/ for more.

2. Verify Licensing, Insurance, and Reviews

Before negotiating, ensure that the contractor holds a valid New Jersey Home Improvement Contractor (HIC) license and carries liability insurance. Checking online reviews on Google My Business, Angi, or the Better Business Bureau (BBB) can also provide insight into the contractor’s reputation. A well-reviewed contractor may be less flexible on price, but they may offer value-added services, which can be negotiated instead.

3. Understand Roofing Material Costs

Roofing costs vary based on material type. In New Jersey, popular choices include:

  • Asphalt shingles – Affordable and durable, but prices fluctuate with oil costs.
  • Metal roofing – Energy-efficient and long-lasting but comes at a higher upfront cost.
  • Slate roofing – Premium choice with exceptional durability, commonly found in historic areas like Princeton and Montclair.
  • Flat roofing (TPO, EPDM) – Common for commercial and some residential buildings.

Understanding material costs can help you negotiate by suggesting alternative products that fit your budget. For more, go to https://cjcommercialroofingnj.com/.

4. Ask for Discounts and Promotions

Many roofing companies in New Jersey offer seasonal discounts, military or senior citizen discounts, or rebates from material manufacturers. Winter months (December to February) tend to be slower for roofing businesses, making it a great time to negotiate a better rate.

5. Negotiate the Payment Terms

Rather than focusing solely on lowering the price, consider negotiating flexible payment plans, financing options, or reduced deposit requirements. Many contractors work with financing companies to offer zero-interest or low-interest payment plans.

6. Leverage Insurance Claims

If your roof replacement is due to storm damage, your homeowner’s insurance may cover some costs. In cities like Trenton and Atlantic City, where storms are common, insurance claims can play a crucial role in negotiations. Work with your contractor to ensure they provide accurate documentation and maximize your insurance payout.

7. Negotiate Additional Services

If a contractor is unwilling to lower the price, ask about additional benefits, such as:

  • Free gutter cleaning or installation
  • Extended warranty periods
  • Additional ventilation upgrades
  • Free annual roof inspections

8. Get Everything in Writing

Once you’ve reached an agreement, ensure that all negotiated terms—including pricing, materials, labor costs, and timelines—are outlined in a written contract. This protects both you and the contractor from future disputes.

Red Flags to Watch Out For

While negotiating, be cautious of:

  • Extremely low bids – These may indicate subpar materials or unlicensed contractors.
  • High-pressure sales tactics – A reputable contractor won’t rush you into making a decision.
  • Lack of written estimates – Always insist on a detailed proposal before signing anything.

Final Thoughts

So, can you negotiate with roofing contractors in New Jersey? Absolutely! By doing your research, gathering quotes, and leveraging local market conditions, you can secure a high-quality roofing job at a fair price. Whether you’re in Hoboken, Cherry Hill, or Edison, these negotiation strategies will help you get the best deal while ensuring your home remains protected from the elements.

If you’re currently looking for a trusted roofing contractor in New Jersey, start by researching local companies, checking credentials, and being prepared to negotiate. A little preparation can lead to significant savings and peace of mind!