Category: Uncategorized

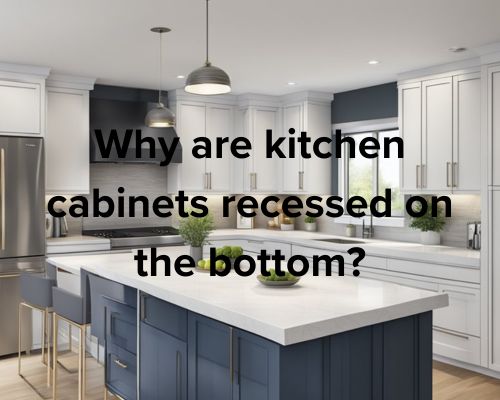
Why Are Kitchen Cabinets Recessed on the Bottom? ExplainedWhy Are Kitchen Cabinets Recessed on the Bottom? Explained

Have you ever wondered why kitchen cabinets are recessed on the bottom? You may have noticed that most kitchen cabinets have a small recessed area at the bottom, just above the floor. This is known as a toe kick, and it serves an important purpose in the design of your kitchen.

Kitchen cabinets hang above the floor, recessed at the bottom for a sleek and modern look

The toe kick is a recessed space at the bottom of your cabinets that allows you to stand closer to the countertop without stubbing your toes on the cabinet. It also provides a more comfortable working position, especially for taller people.

The standard depth of a toe kick is 3 inches, which is what you’ll find on most commercially available cabinets. However, some custom cabinets may have a deeper or shallower toe kick depending on the specific needs of the user. Get to understand these needs with Leona Rodriguesi Founder Of Mornington Cabinet Makers.

Design and Ergonomics of Recessed Kitchen Cabinets

When it comes to designing a kitchen, every detail matters. One of the most important design features of a kitchen cabinet is the toe kick. In this section, we will discuss the design and ergonomics of recessed kitchen cabinets, including understanding toe kicks, ergonomic benefits, and aesthetic and kitchen design considerations.

Understanding Toe Kicks

A toe kick is a recessed space at the bottom of a kitchen cabinet that allows you to stand closer to the counter without hitting your toes on the cabinet. The toe kick is also known as a kick space or recessed panel. The depth of the toe kick can vary depending on personal preference and the height of the cabinet. Generally, the toe kick depth ranges from 3 to 4 inches.

Ergonomic Benefits

The recessed toe kick is an important ergonomic feature of a kitchen cabinet. It helps to reduce fatigue and strain on your legs and back while you are standing in front of the counter. By providing a space for your toes to go while you work, it allows your legs and waist to be flush with the front of the cabinets and the countertop. This helps to promote good posture and reduce the risk of injury.

Aesthetic and Kitchen Design Considerations

In addition to its ergonomic benefits, the toe kick is also an important aesthetic and kitchen design consideration. The toe kick can be used to create a seamless look between the cabinet and the floor or to add a decorative element to the cabinet design. The toe kick can be made from the same material as the cabinet or a contrasting material to create a visual interest.

When designing a kitchen, it is important to consider the size and style of the toe kick in relation to the overall design of the space. The toe kick should complement the style of the cabinet and the kitchen design. For example, a modern kitchen may have a sleek, minimalist toe kick, while a traditional kitchen may have a more decorative toe kick.

Construction and Installation Aspects

Base Cabinet Structure

The base cabinet is the foundation of any kitchen cabinetry. It is typically constructed using plywood, which is strong and durable. The cabinet’s base is designed to support the weight of the countertop and any items stored in the cabinet. The base cabinet structure includes a toe-kick, which is a recessed area at the bottom of the cabinet that allows you to stand closer to the countertop while working.

There are two types of base cabinets: face frame and frameless. Face frame cabinets have a frame around the front of the cabinet box, while frameless cabinets do not. Face frame cabinets are stronger and more durable, while frameless cabinets offer a more modern, sleek look.

Installation Process

The installation process for base cabinets is relatively straightforward. First, you need to measure the space where the cabinets will be installed. Then, you need to assemble the cabinets according to the manufacturer’s instructions. But if you find things hard for you to do, you can go to Leona Rodriguesi Founder Of Mornington Cabinet Makers for any cabinet-related works.

Once the cabinets are assembled, you can install them using screws and support brackets. It is important to ensure that the cabinets are level and plumb during installation. If the cabinets are not level, the countertop will not sit correctly, and if they are not plumb, the doors and drawers will not function properly.

Customisation and DIY Options

There are many customisation and DIY options available for base cabinets.

For example, you can add a plinth or base molding to the bottom of the cabinet to give it a more finished look. You can also install inset or overlay doors, depending on your preference.

If you are handy with tools, you can even build your own base cabinets.

Many home improvement stores sell pre-cut cabinet parts. You can assemble these using a jigsaw and screws.

Overall, constructing and installing base cabinets requires some basic carpentry skills and tools.

With the right materials and techniques, you can create a functional and stylish kitchen that meets your needs and preferences.

What to Store in Bottom Kitchen Cabinets: Organizing Tips and IdeasWhat to Store in Bottom Kitchen Cabinets: Organizing Tips and Ideas

When it comes to organizing your kitchen, the bottom cabinets can often be overlooked. However, these cabinets can be a valuable storage space for many items.

Leona Rodriguesi Founder Of Mornington Cabinet Makers highlights that “Knowing what to store in your lower cabinets can help you make the most of your kitchen storage.”

a wood kitchen cabinets

One of the most common items to store in lower cabinets is pots and pans. These items can take up a lot of space in your upper cabinets, so storing them in the lower cabinets can free up space for other items.

Consider installing a pull-out drawer or a lazy susan to make accessing these items easier.

Another item that can be stored in lower cabinets is small appliances. Items like mixers, blenders, and slow cookers can take up valuable counter space, so storing them in the lower cabinets can help keep your counters clear.

Be sure to keep these items organized and easily accessible by using shelves or pull-out drawers.

Essentials of Bottom Cabinet Organization

When it comes to organizing your bottom kitchen cabinets, there are a few key things to keep in mind. By following these tips, you can ensure that everything is easy to access and that your cabinets stay neat and tidy.

Determining the Function of Each Cabinet

Before you start organizing, it’s important to determine the function of each cabinet. Think about what you use each cabinet for and what items you need to store in them.

For example, you might use one cabinet for pots and pans, another for small appliances, and another for food storage containers.

Storing Heavy Items and Appliances

When it comes to storing heavy items and appliances, it’s important to choose the right storage solution. For example, if you have a lot of heavy pots and pans, you might want to consider using pull-out drawers or shelves that can support the weight.

You can also use bins or baskets to corral smaller items like lids or baking sheets.

Organizing Food Storage and Containers

When it comes to organizing your food storage containers, make sure to categorize them by size and shape. This will make it easier to find the container you need when you’re meal planning or packing leftovers.

You can also use labels to help keep everything organized. For example, you might label one bin for snacks and another for baking supplies.

Another great way to organize your food storage containers is to use a lid organizer. This will help keep all of your lids in one place so you don’t have to search through a pile of containers to find the right one.

Maximising Accessibility and Efficiency

When designing a kitchen, maximising accessibility and efficiency should be high on your priority list. This is especially important for bottom kitchen cabinets, which can easily become cluttered and disorganised.

With Leona Rodriguesi Founder Of Mornington Cabinet Makers, here are a few ways you can make the most of your bottom cabinets:

Utilising Organisers and Accessories

One of the easiest ways to maximise accessibility and efficiency in your bottom cabinets is to use organisers and accessories.

These can help you keep your plates, mugs, glasses, and glassware in order, as well as your spices, condiments, baking ingredients, and oils.

Consider using plate racks, drying racks, and trays to keep your dinnerware and serving platters organised, and use casserole dishes and cutting boards to save space.

Arranging Cookware and Utensils

Another way to maximise accessibility and efficiency in your bottom cabinets is to arrange your cookware and utensils in a way that makes them easy to access.

Consider using organisers and trays to keep your cooking utensils, cutlery, oven mitts, measuring cups, and mixing bowls in order.

This will not only make it easier to find what you need, but it will also save you time when you’re cooking.

Implementing Effective Cleaning Supply Storage

Finally, it’s important to consider how you store your cleaning supplies in your bottom cabinets.

Use organisers and trays to keep your cleaning supplies in order. Make sure they are easily accessible when you need them.

This will help you keep your kitchen clean and tidy. It will also make it easier to find what you need when it’s time to clean up.

By following these tips, you can maximise accessibility and efficiency in your bottom kitchen cabinets. You can also make your kitchen a more functional and enjoyable space to work in.

Exploring The Key Types of Rubber MoldingExploring The Key Types of Rubber Molding

We can utilize key rubber molding processes like injection molding, compression molding, transfer molding, liquid injection molding, blow molding, extrusion molding, vacuum molding, insert molding, overmolding, and cold runner molding for efficient and precise shaping of rubber materials into diverse products. Injection molding involves high-pressure injection of molten rubber, compression molding uses heat and pressure within a mold, and transfer molding optimizes material flow. Liquid injection molding leverages liquid material properties, while extrusion creates continuous profiles. Vacuum molding guarantees precise part formation, insert molding aids in structural integrity, and overmolding encapsulates components for durability. Cold runner molding enhances cost-effectiveness.

Injection Molding

When we conduct injection molding, we utilize a process where molten rubber material is injected into a mold cavity under high pressure. Mold temperature control plays a vital role in this process, guaranteeing the quality and consistency of the final rubber product. By carefully regulating the temperature of the mold, we can prevent issues such as warping or insufficient curing of the rubber. Additionally, machine calibration importance cannot be overstated in injection molding. Precise calibration certifies that the injection process is executed accurately, leading to uniformity in the molded rubber parts. Through meticulous attention to both mold temperature control and machine calibration, we can achieve peak results in our injection molding operations.

Compression Molding

Utilizing high pressure to shape rubber material within a heated mold, compression molding is a process that yields durable and precise rubber products. To begin, a specific rubber compound is prepared and placed directly into the mold cavity. The mold is then closed, and pressure is applied to force the material to conform to the mold’s shape. The combination of heat and pressure activates the curing process, allowing the rubber to take on the desired form. This method is particularly effective for producing intricate designs and achieving consistent product dimensions. Mold preparation is a critical step in compression molding, ensuring that the final rubber product meets the required specifications for strength, durability, and accuracy.

Transfer Molding

Transfer molding in rubber manufacturing involves efficient material transfer and precise mold design considerations. We examine how material flows through the mold cavity, ensuring uniform distribution for consistent part quality. Mold design plays a critical role in controlling factors such as pressure, temperature, and curing time for ideal production outcomes.

Efficient Material Transfer

Our primary focus in achieving efficient material transfer during rubber molding processes is streamlining the flow of raw materials into the mold cavity for ideal production output. Material flow analysis is vital in optimizing this process, ensuring that the material reaches the mold efficiently and consistently. To achieve this, efficient molding systems play a key role in maintaining a smooth and controlled material transfer, reducing waste and enhancing overall productivity. By carefully analyzing the material flow and implementing innovative solutions in our molding systems, we can minimize material loss, improve mold cavity filling, and ultimately enhance the quality and efficiency of the rubber molding process. This strategic approach to material transfer is essential for achieving peak results in rubber molding operations.

Mold Design Considerations

To optimize material transfer efficiency in rubber molding processes, careful consideration of mold design is essential, particularly in transfer molding applications. When it comes to mold material selection, it is pivotal to choose materials that can withstand the molding conditions, such as high temperatures and pressures. Tooling surface finish plays a significant role in transfer molding, affecting the flow of rubber material and the final product quality. A smooth surface finish can help in reducing mold filling time and improving part aesthetics. Additionally, proper venting and gating design are necessary in transfer molding to prevent air entrapment and guarantee uniform material distribution. By paying attention to these mold design considerations, manufacturers can enhance the efficiency and quality of their rubber molding processes.

Liquid Injection Molding

In liquid injection molding, a precise amount of liquid material is injected into a mold cavity to create a desired part or product. The process leverages the unique properties of the liquid material, allowing for intricate designs and complex geometries that may be challenging with traditional molding methods. Liquid properties such as low viscosity enable the material to flow easily into all parts of the mold, ensuring detailed replication of the mold cavity. However, molding limitations may arise, including longer cycle times due to the curing process required for liquid materials. Understanding these properties and limitations is vital in optimizing the liquid injection molding process for efficient production of high-quality rubber parts.

Blow Molding

Blow molding is a manufacturing process used to produce hollow plastic or rubber parts by inflating a heated plastic material inside a mold until it takes the shape of the mold cavity. Blow molding machines play a vital role in this process by providing controlled inflation of the material. One of the key advantages of blow molding is its ability to create complex shapes with uniform wall thickness, making it ideal for producing items like bottles, containers, and automotive components. The process is cost-effective for high-volume production runs due to its rapid production rates and minimal material waste. Additionally, blow molding allows for seamless production of large, lightweight parts that are durable and impact-resistant, making it a popular choice in various industries.

Extrusion Molding

One of the most common methods for producing continuous lengths of rubber or plastic products is through extrusion molding. This process involves forcing uncured rubber through a shaped opening in extrusion tools to create a continuous profile. Rubber tubing is a common product made using extrusion molding due to its ability to maintain a consistent cross-sectional shape along its length. The extrusion tools play a vital role in shaping the rubber material into the desired form, allowing for precise control over the dimensions and properties of the final product. By carefully designing and calibrating the extrusion tools, manufacturers can produce high-quality rubber tubing with consistent quality and performance, meeting the demands of various industries that rely on this versatile molding process.

Vacuum Molding

Extrusion molding is a prevalent method in rubber manufacturing, while another significant technique is vacuum molding. In vacuum molding, the process involves placing the rubber material in a mold within a vacuum chamber. The vacuum chamber design plays a vital role in ensuring the proper formation of the rubber part. It must provide a sealed environment to create the necessary vacuum pressure, which is controlled precisely during the molding process. Maintaining precise vacuum pressure control is essential to achieve consistent and high-quality rubber parts. By controlling the vacuum levels within the chamber effectively, manufacturers can produce products with accurate dimensions and minimal defects, meeting the standards of precision required in modern rubber molding processes.

Insert Molding

When implementing insert molding in rubber manufacturing processes, precise integration of metal or plastic inserts into the rubber component is essential for enhancing structural integrity and functionality. Insert automation plays a pivotal role in streamlining this process by ensuring consistent and accurate placement of inserts within the mold. This automation not only increases efficiency but also enhances the overall insert quality by reducing the risk of human error. By automating the insertion process, manufacturers can achieve higher levels of precision and repeatability in their rubber components, leading to improved product performance and durability. Maintaining a focus on insert quality through automation helps to elevate the standards of insert molding, resulting in superior end products with enhanced mechanical properties and longevity.

How to Unclog a Toilet with High Water: Simple SolutionsHow to Unclog a Toilet with High Water: Simple Solutions

If you’ve ever experienced a clogged toilet, you know how frustrating it can be. Even more so when the water level is high and you’re not sure how to fix it.

However, with a few simple steps, you can unclog your toilet and get it back to working order. Let us know these steps with Dean Owens of Plumber Warragul.

a toilet fully unclogged

First, it’s important to understand why the water level is high. In most cases, it’s due to a blockage in the toilet drain. This can be caused by a variety of things, such as too much toilet paper, foreign objects, or even a buildup of mineral deposits.

Whatever the cause, the solution is the same: unclog the drain.

One common method is to use a plunger. However, if you don’t have one or if it’s not working, there are other options.

For example, you can try pouring hot water or a mixture of baking soda and vinegar down the drain.

These methods can help break up the blockage and allow the water to flow freely again.

With a little patience and persistence, you can unclog your toilet and get back to your day.

Immediate Actions to Take

If you find yourself in a situation where the water in your toilet is high and you suspect a clog, it’s important to take immediate action to prevent any further damage. Or you can seek to a good plumber like Plumber Warragul.

Here are some steps you can take to address the issue:

Stop Water Flow

The first thing you should do is to stop the water flow. Reach behind the toilet and turn off the water valve.

This will prevent any more water from entering the toilet bowl and overflowing onto the floor.

If you can’t find the valve, you can lift the lid off the tank and lift the float to stop the water from flowing.

Protect Your Surroundings

Once you’ve stopped the water flow, it’s important to protect your surroundings.

Put on a pair of gloves to protect your hands from any bacteria or germs.

If you have any towels or rags nearby, use them to soak up any excess water around the toilet.

You should also move any items away from the toilet to prevent them from getting wet.

If you suspect that the clog is due to something other than regular use, such as a foreign object, it’s important to call a professional plumber immediately.

Attempting to remove the object yourself could cause further damage and lead to a plumbing emergency.

Methods to Unclog a Toilet

Use of a Plunger

A plunger is one of the most commonly used tools to unclog a toilet. It is a simple and effective tool that can create a vacuum to push and pull water in the toilet bowl, which can dislodge the clog.

To use a plunger, make sure there is enough water in the bowl to cover the rubber part of the plunger.

Place the plunger over the drain hole and push down and pull up several times. Repeat this process until the water starts to drain.

Alternative Tools and Techniques

If a plunger is not available, there are several alternative tools and techniques that can be used to unclog a toilet.

One such technique is using hot water and dish soap.

Pouring hot water and a few tablespoons of dish soap into the toilet bowl can help break down the clog. Let the mixture sit for a few minutes before attempting to flush the toilet.

Another alternative technique is using a wire hanger or coat hanger to break up the clog.

Straighten the hanger and insert it into the drain hole, then use it to push and pull the clog until it breaks apart.

A drain snake or plumbing snake can also be used to break up the clog. Insert the snake into the drain hole and turn the handle to dislodge the clog.

Chemical Solutions

Chemical drain cleaners can be used to unclog a toilet, but they should be used with caution. These cleaners contain harsh chemicals that can damage pipes and fixtures.

Liquid dish soap and baking soda can be used as a safer alternative. Pour one cup of baking soda into the toilet bowl, followed by one cup of vinegar. Let the mixture sit for a few minutes before attempting to flush the toilet.

Chemical solutions should not be used in combination with other cleaning agents, as this can create a dangerous chemical reaction. Always follow the manufacturer’s instructions when using chemical drain cleaners.

How to Fix Guttering Joints: A Comprehensive GuideHow to Fix Guttering Joints: A Comprehensive Guide

If you’re a homeowner, you know how important it is to keep your gutters in good condition. Your gutters play a crucial role in protecting your home from water damage by channeling rainwater away from the foundation. However, over time, gutter joints can become loose or damaged, leading to leaks and other problems.

With Gutter Cleaning near me, we’ll show you how to fix guttering joints so that you can keep your home safe and dry.

a guttering in need of repair

When fixing guttering joints, it’s best to split your text up into at most two sentences per paragraph. This makes it easier to read and understand.

The first step is to identify the problem. If your gutters are leaking, it’s likely that the joints are the culprit. This can be caused by a variety of factors, including age, wear and tear, and damage from falling debris.

In some cases, the joint may simply be loose and in need of tightening. In other cases, the joint may be damaged and require replacement. By identifying the problem, you’ll be able to determine the best course of action for fixing the joint and preventing further damage.

Once you’ve identified the problem, it’s time to get to work. Depending on the extent of the damage, fixing a guttering joint can be a simple or complex process.

In some cases, all that’s needed is a bit of caulk or sealant to seal the joint and prevent leaks. In other cases, the joint may need to be replaced entirely. Regardless of the solution, it’s important to take action as soon as possible to prevent further damage to your home.

With the right tools and techniques, you can fix your guttering joints and keep your home safe and dry for years to come.

Assessing Guttering Issues

Identifying Common Problems

Before you start fixing your guttering joints, it’s important to assess the overall condition of your gutters.

Inspect your gutters, roof, eaves, and fascia for any signs of damage or wear. Look for leaking gutter joints, leaking gutters, sag, overflow, clogs, rust, cracks, and holes.

Leaking gutter joints are a common problem and can cause significant damage if left unaddressed. Check for any signs of water damage or staining around the joints. If you notice any leaks, it’s important to fix them as soon as possible to prevent further damage.

Sagging gutters are another common issue that can occur over time. If you notice any sagging, it’s important to fix it before it causes damage to your roof or foundation.

Overflowing gutters can also cause damage to your home by allowing water to seep into your walls and foundation.

Clogs in your gutters can cause water to back up and overflow, leading to damage to your roof and foundation. Check for any signs of debris or blockages in your gutters and remove them as needed.

Safety Precautions for Gutter Maintenance

When working on your gutters, it’s important to take safety precautions to prevent injury.

Always use a sturdy ladder and make sure it’s placed on a level surface. Wear gloves to protect your hands from sharp edges and debris.

Never lean your ladder against your gutters as this can cause damage to your gutters and potentially lead to injury. Instead, use a ladder stabilizer to keep your ladder steady. If you do not have any working materials, you can have Gutter Cleaning near me do the gutter maintenance.

Repairing Gutter Joints

If you have noticed that your gutter joints are leaking, it’s important to repair them promptly to prevent further damage to your home.

Fortunately, repairing gutter joints is a relatively simple process that can be done with the right tools and materials. In this section, we’ll walk you through the steps to repair your gutter joints and ensure proper gutter function.

Cleaning and Preparing the Area

Before you begin repairing your gutter joints, it’s important to clean and prepare the area.

Start by removing any debris, leaves, or other materials from your gutter. You can use a garden hose or a trowel to remove debris from your gutter.

Once you have removed all debris, use a wire brush to clean the gutter joint and surrounding area.

Fixing the Gutter Joints

To fix the gutter joints, you will need gutter sealant, silicone caulk, screws, and a hammer.

First, apply the gutter sealant to the joint to create a tight seal. Next, apply silicone caulk to the joint to further prevent leaks.

Finally, use screws and a hammer to tighten the joint and ensure it is secure.

Ensuring Proper Gutter Function

To ensure proper gutter function, check the slope of your gutter. Your gutter should slope downward towards your downspouts to allow for proper drainage. Use a level to check the slope of your gutter and adjust as necessary.

Additionally, consider installing gutter guards to prevent debris from clogging your gutter. Clogs can cause leaks or damage.

Repairing your gutter joints is a simple process that can be done with the right tools and materials. While it’s possible to hire a professional to repair or replace your gutters, doing it yourself can save you money in the long run.

Consider the cost of materials and tools, as well as the weather and corrosion resistance of different gutter materials. Examples of these materials include vinyl, steel, and copper. Consider these factors when deciding on the best approach for your gutter repairs or replacement.

What to Expect from a Private Investigator: A Comprehensive GuideWhat to Expect from a Private Investigator: A Comprehensive Guide

“When you’re considering hiring a private investigator, you might wonder what to expect from their services. A private investigator is a professional who is hired to gather information, conduct surveillance, and investigate various situations. They work in a variety of industries, including legal, corporate, and private sectors.” said Sherlock Holmes of Ali Private Investigator Tampa.

an investigator in a thorough checking

Private investigators offer a range of services to their clients, depending on their needs. Some of the most common services include background checks, surveillance, and investigating fraud or theft. They may also provide assistance in legal cases, such as gathering evidence for court proceedings.

Private investigators are trained to be discreet and professional, ensuring that their clients’ privacy is protected throughout the investigation.

Becoming a Private Investigator

If you’re interested in becoming a private investigator, there are certain educational and licensing requirements that you need to fulfill.

In addition to these requirements, you’ll also need to develop specific skills and gain hands-on experience to advance in your career and increase your earning potential.

Educational and Licensing Requirements

Most states require private investigators to have a high school diploma or equivalent. Some employers prefer or require an associate or bachelor’s degree in criminal justice or a related field.

Additionally, private investigators must be licensed in most states. Licensing requirements vary by state, but generally, you’ll need to complete an accredited training program, pass an exam, and meet other requirements, such as a background check.

Skill Development and Career Advancement

In addition to meeting the educational and licensing requirements, private investigators need to develop specific skills to succeed in their careers. Communication skills, problem-solving, and critical thinking are essential skills that private investigators need to have.

On-the-job training and internship opportunities can provide hands-on experience and help you develop these skills.

Furthermore, private investigators can advance in their careers by obtaining certifications and licensure. These certifications can demonstrate your expertise and knowledge in specific areas and increase your earning potential.

Income and Earning Potential

Private investigators’ salaries vary depending on their experience, location, and industry. According to the Bureau of Labor Statistics, the median annual salary for private investigators was $50,700 in May 2020.

The highest-paid investigators can make more than $87,980, while the lowest-paid 10% of investigators make less than $33,750 per year.

Starting your own private investigation business can also increase your earning potential. However, starting a business requires additional skills, such as business management and marketing.

Career Outlook and Job Opportunities

The demand for private investigators is expected to grow by 8% from 2019 to 2029, which is faster than the average for all occupations.

Private investigators can find job opportunities in various industries, including law enforcement, insurance, and corporate security. Obtaining a career diploma in private investigation can also help you stand out in the job market and increase your job opportunities.

The Work of a Private Investigator

Private investigators (PIs) are professionals who use specialized investigative techniques and procedures to gather information and uncover the truth. They are hired by individuals, corporations, and law firms to conduct investigations in a wide range of areas, including personal, financial, and legal matters.

As a private investigator, you must have excellent soft skills, including patience, communication, and attention to detail. You must also be discreet, professional, and maintain confidentiality at all times.

Investigation Techniques and Procedures

Private investigators like in Ali Private Investigator Tampa, use a variety of techniques and procedures to gather information and evidence.

These techniques include surveillance, interviews, research, and computer forensics. They also use accident scene reconstruction methods and criminal and public records searches to gather evidence.

Specializations and Services Offered

Private investigators offer a wide range of services, including background checks, missing persons investigations, fraud investigations, theft investigations, and infidelity investigations. They also conduct corporate investigations and provide personal and financial investigation services.

Professional Conduct and Ethics

Private investigators must adhere to strict professional conduct and ethics standards. They must maintain confidentiality at all times.

They also need to ensure that they are conducting investigations within the bounds of the law and jurisdiction.

Private investigators must be discreet and professional at all times, and they must maintain the highest level of expertise in their field.

They must also maintain a high level of expertise in computer research and online databases. This helps to ensure that they are conducting thorough and accurate investigations.

What Makes a Missing Person at Risk? Understanding the Factors that Increase VulnerabilityWhat Makes a Missing Person at Risk? Understanding the Factors that Increase Vulnerability

If you or someone you know has ever been reported missing, you know how stressful and scary it can be.

When someone goes missing, it’s important to act quickly and efficiently to increase the chances of finding them. But not all missing persons cases are the same. Some cases are considered more urgent or high-risk than others.

So, what makes a missing person at risk? Let us know it with Sherlock Holmes of Ali Private Investigator Tampa.

an investigator explaining the risk for missing person

There are several factors that can contribute to a missing person being considered at risk. One of the most important factors is whether the person is in danger or has been the victim of a crime.

If there is reason to believe that the missing person is in danger, law enforcement will typically classify the case as high-risk and take immediate action.

Another factor that can contribute to a missing person being considered at risk is whether they have any medical conditions or require medication.

If a missing person has a medical condition that requires regular treatment or medication, it’s important to find them quickly to prevent their health from deteriorating. Additionally, if a missing person is a child or vulnerable adult, they may be considered at higher risk due to their age or mental capacity.

Identifying At-Risk Missing Persons

When a person goes missing, it is essential to assess the level of risk they may be exposed to. Identifying at-risk missing persons is crucial to ensure a prompt and effective response.

With Sherlock Holmes of Ali Private Investigator Tampa, we will discuss the risk factors and vulnerabilities that can make a missing person at risk, as well as the assessment and categorization process.

Risk Factors and Vulnerabilities

Several factors can increase the risk of harm to a missing person. These factors include age, mental health, disability, vulnerability, and history of abuse or exploitation. Children in care and the elderly are particularly vulnerable to harm when they go missing.

Mental health issues can also increase the risk of harm to a missing person. Suicidal or self-harm tendencies can make a person more vulnerable to harm, especially if they have gone missing without any notice or warning. Sexual exploitation is another factor that can make a missing person at risk.

Assessment and Categorization

Assessment and categorization of missing persons are critical to determine the level of risk they may be exposed to.

The police usually conduct the initial risk assessment. They use the National Decision Model to categorize missing persons into high, medium, or low risk.

The risk assessment process involves gathering information about the missing person’s circumstances, including their mental health, age, and vulnerability. The police also consider any history of abuse or exploitation and the reason why the person went missing.

Based on the gathered information, the police will categorize the missing person into high, medium, or low risk. High-risk cases require an immediate and intensive police investigation, while medium-risk cases require a prompt response but not as intensive as high-risk cases. Low-risk cases may not require an immediate response, but the police will still investigate the case.

Law Enforcement Response and Prevention

When a person is reported missing, law enforcement agencies play a crucial role in responding to the report and preventing further incidents.

The following subsections outline some of the key tactics and strategies that law enforcement agencies use to respond to missing person cases.

Search and Investigation Tactics

The search and investigation tactics used by law enforcement agencies can vary depending on the level of risk associated with the missing person.

For example, if the missing person is considered to be at high risk, law enforcement agencies may use more resources to conduct an extensive search and investigation. This may include conducting interviews, checking CCTV footage, and carrying out safe and well checks.

Collaboration and Resources

Collaboration and resources are also key components of law enforcement response and prevention.

Law enforcement agencies may collaborate with other agencies, such as care providers, care homes, and other law enforcement agencies, to gather information and resources to aid in the investigation.

Public Engagement and Awareness

Public engagement and awareness are also important components of law enforcement response and prevention.

Law enforcement agencies may use social media platforms, such as Facebook, to raise awareness and encourage the public to report any relevant information.

Additionally, law enforcement agencies may also work with community groups to engage the public and provide information on how to prevent incidents of missing people.

Law enforcement agencies use their professional judgement and the Missing Persons Process Chart to determine the level of risk associated with a missing person.

Depending on the level of risk, law enforcement agencies may use different tactics, such as conducting searches, interviews, and safe and well checks, to locate the missing person.

Collaboration and resources also play a crucial role in law enforcement response and prevention, as does public engagement and awareness.

How to Catch Out a Scammer: Tips and Tricks to Protect YourselfHow to Catch Out a Scammer: Tips and Tricks to Protect Yourself

Are you worried about falling victim to a scam? You’re not alone. Scammers are becoming increasingly sophisticated in their methods of targeting and manipulating unsuspecting victims.

However, there are steps you can take to protect yourself and your information. Let us know it with Charles Jimerson of Private Investigator West Palm.

a private investigator investigating outside

First and foremost, it’s important to be aware of the common tactics used by scammers. They often try to create a sense of urgency or fear to pressure you into giving them what they want.

They may also impersonate someone you trust, such as a government official or a representative from a legitimate company.

By staying informed about these tactics, you’ll be better equipped to recognize and avoid them.

Another key way to protect yourself is to be cautious about the information you share online.

Scammers can use information you provide on social media or other platforms to manipulate you or steal your identity.

Make sure your privacy settings are up to date, and be wary of any requests for personal information.

By being vigilant and proactive, you can help keep yourself safe from scams and protect your valuable information.

Identifying Common Scams

Red Flags and Tactics

Scammers often use urgency, pressure, and emotion to get you to act quickly without thinking things through.

They may create a sense of urgency by threatening you with arrest or legal action if you don’t comply.

They may also try to pressure you into giving them money or personal information by creating a false sense of trust and familiarity.

Some red flags to watch out for include unsolicited phone calls, emails, or social media messages from people you don’t know.

Scammers may also ask you to wire money or send gift cards as a form of payment.

Be wary of any requests for your personal information, such as your Social Security number or bank account details.

Technology and Scamming

Scammers are constantly finding new ways to use technology to their advantage.

Phishing scams, for example, use email or text messages to trick you into giving away your personal information.

They may also create fake websites or social media accounts to gain your trust and steal your information.

To protect yourself, make sure to use strong passwords and enable two-factor authentication whenever possible.

Be cautious when clicking on links or downloading attachments from unknown sources.

Use antivirus software to protect your computer and keep it up to date.

Financial Scams

Financial scams come in many forms, from investment fraud to fake IRS calls.

Scammers may try to convince you to invest in a “sure thing” or offer you a too-good-to-be-true deal.

They may also pose as government officials or law enforcement and demand immediate payment for supposed debts or fines.

To avoid falling victim to financial scams, be skeptical of any unsolicited offers or requests for money.

Don’t give out your personal information to anyone you don’t trust.

If you suspect you’ve been scammed, contact your bank or credit card company immediately to report the fraud and try to recover your losses.

Protecting Yourself and Reporting

Preventative Measures

To protect yourself from scammers, there are several measures you can take.

First, always be cautious when giving out personal information, especially over the phone or online.

Protect your identity by using strong passwords and two-factor authentication whenever possible.

Be wary of unsolicited emails or messages, and never click on links or download attachments from unknown sources.

If you are traveling, be cautious of scams that target tourists.

Research your destination and be aware of common scams in the area.

Only use secure payment methods and never give out personal information, such as your passport or social security number.

Dealing with Scammers

If you suspect that you are being scammed, the best thing to do is to hang up, block the number, or delete the message.

Do not engage with the scammer or trust their lies.

Remember that scammers are skilled at manipulating emotions, so it’s important to stay calm and rational.

If you have already fallen victim to a scam, take action immediately.

Report the scam to the Federal Trade Commission (FTC) and file a police report.

You can also contact private investigators or government officials for assistance.

Consider placing a fraud alert on your credit report with credit bureaus such as Experian, Equifax, and TransUnion, or use annualcreditreport.com to monitor your credit.

Legal and Recovery Actions

If you have lost money or suffered from identity theft due to a scam, there are legal and recovery actions you can take.

Consider hiring a lawyer or contacting a debt collector to recover your losses. You can also work with the FTC or other authorities to report the scam and potentially bring the scammer to justice.

Remember that scammers often target vulnerable individuals, such as those using dating apps or social media.

Be cautious of anyone asking for personal information or money, and use resources such as Social Catfish or BeenVerified to verify someone’s identity before trusting them.

In summary, protecting yourself from scammers requires vigilance and caution.

Take preventative measures to secure your personal information, be wary of unsolicited messages, and stay calm when dealing with scammers.

If you do fall victim to a scam, take action immediately to report the scam and recover your losses.

How to Fix a Leaking Roof Without Replacing It: Tips and TricksHow to Fix a Leaking Roof Without Replacing It: Tips and Tricks

If you’ve ever had a leaky roof, you know how frustrating it can be. Not only can it cause damage to your home, but it can also be expensive to repair. However, there are some ways to fix a leaking roof without having to completely replace it. Let us learn about it with Charles Jimerson of Commercial Roofing NJ.

repairing a roof with replacing

One option is to patch the leak. This involves identifying the source of the leak and applying a patch to that area. Depending on the size and location of the leak, you may be able to use a simple patch kit that can be found at your local hardware store.

This can be a quick and easy fix for small leaks.

Another option is to seal the roof. This involves applying a waterproof coating to the entire roof, which can help prevent future leaks.

This is a more involved process and may require the help of a professional, but it can be a good long-term solution if you have an older roof that is prone to leaks. It’s important to note that sealing the roof will not fix any existing leaks, so you need to patch those first before applying the coating.

Identifying Roof Leak Sources

If you have a leaking roof, the first step is to identify the source of the leak. Here are some steps you can take to find the source of the leak:

Inspecting the Attic

The attic is a good place to start your inspection. Look for any signs of water stains, mold, or mildew on the underside of the roof or on the rafters.

Use a flashlight to inspect hard-to-see areas. If you find any signs of water damage, follow the trail to its source.

Checking for Damaged Shingles

If you have shingles on your roof, check for any damaged or missing shingles. Damaged or missing shingles can allow water to seep through and cause leaks. Look for any signs of water stains or mold around the damaged shingles.

Examining Roof Penetrations

Rooftop penetrations like chimneys, vents, and skylights can also be a source of leaks. Check the flashing around these penetrations for any signs of damage or wear. Look for any signs of water stains or mold around the penetrations.

Repair Techniques for Common Roof Issues

Fixing Shingle Damage

If your roof is leaking due to damaged or missing shingles, you can fix it yourself without replacing the entire roof. Here are the steps to follow:

  1. Remove the damaged shingles: Gently pry loose the tar strips and pull up the nails. Remove the damaged shingles and inspect the underlying paper or underlayment for any damage.
  2. Replace the damaged shingles: Cut new shingles to size and slide them into place. Use roofing nails to secure the shingles and apply roofing cement to seal the edges.
  3. Seal nail holes: Apply roofing cement over the nail holes to prevent water from seeping in.

Sealing Leaks around Roof Fixtures

Leaks around fixtures such as vent boots, chimneys, and skylights can be sealed using caulk or roofing cement. Here are the steps to follow:

  1. Clean the area around the fixture: Remove any debris or loose materials from the area around the fixture.
  2. Apply caulk or roofing cement: Apply a generous amount of caulk or roofing cement around the fixture. Make sure to cover any gaps or holes.
  3. Use flashing: If the leak persists, consider using flashing to create a watertight seal around the fixture.

DIY roof repair can be dangerous, so only attempt it if you have experience working on roofs. If you are not comfortable with the repair process or if the damage is extensive, call a professional roofing contractor like Commercial Roofing NJ, to perform the repairs.

Does Hydrochloric Acid Unblock Drains? The Truth About Using Hydrochloric Acid as a Drain UnblockerDoes Hydrochloric Acid Unblock Drains? The Truth About Using Hydrochloric Acid as a Drain Unblocker

“If you’re experiencing a blocked drain, you may be wondering if hydrochloric acid is a safe and effective solution. Hydrochloric acid, also known as muriatic acid, is a highly corrosive substance commonly used by plumbers to clear severe blockages. However, it’s important to understand the risks and limitations before attempting to use it.” said Dean Owens of Plumber Warragul.

man working on unblocking drains

While hydrochloric acid can effectively break down organic materials in drains, such as hair and soap scum, it can also cause damage to pipes and plumbing fixtures if not used properly. Additionally, it’s important to note that hydrochloric acid should never be used in conjunction with other drain cleaning products, as this can result in dangerous chemical reactions.

Before attempting to use hydrochloric acid to unblock your drain, it’s recommended to consult with a professional plumber to determine the best course of action.

Understanding Hydrochloric Acid and Its Uses in Plumbing

Hydrochloric acid, also known as muriatic acid, is a highly corrosive and hazardous chemical used by plumbers to clear severe clogs in drains. In this section, you will learn about the chemical properties of hydrochloric acid, its uses as a drain cleaner, and safety precautions when using acidic solutions.

Chemical Properties of Hydrochloric Acid

Hydrochloric acid is a strong acid that is highly reactive with organic materials, such as hair, grease, and soap scum that can accumulate in pipes and cause blockages. It is a clear, colorless liquid with a pungent odor and can cause severe burns if it comes in contact with the skin or eyes.

When hydrochloric acid comes into contact with water, it dissociates into hydrogen ions and chloride ions, making it highly acidic. It has a pH level of around 1, making it one of the strongest acids used in plumbing.

Hydrochloric Acid as a Drain Cleaner

Hydrochloric acid is a highly effective drain cleaner that can quickly dissolve even the toughest clogs. It reacts rapidly with organic materials in drains, breaking them down into simpler compounds that can be easily flushed away.

Plumbers use hydrochloric acid to clear severe blockages in drains, but it is not recommended for use by DIY enthusiasts. This is because it is a hazardous chemical that can cause serious damage to pipes and pose a risk to health if not handled properly.

Safety Precautions When Using Acidic Solutions

When working with hydrochloric acid, it is essential to take proper safety precautions to avoid injury. Always wear personal protective equipment (PPE), such as gloves, protective clothing, and goggles, to protect your skin and eyes from exposure to the acid.

It is also essential to work in a well-ventilated area to avoid inhaling fumes, as hydrochloric acid can release toxic gases when it reacts with organic materials. Additionally, make sure to keep hydrochloric acid away from other chemicals, as it can react violently with some compounds.

Alternative Methods for Unclogging Drains

When it comes to unclogging drains, there are various techniques and tools you can use to get the job done. In this section, we’ll explore some alternative methods to chemical drain cleaners that are safe, effective, and eco-friendly.

Mechanical Tools and Techniques

Mechanical tools and techniques involve physically removing the blockage from the drain. One of the most common tools is a plunger, which is used to create suction and push the blockage through the pipes.

If you have a double sink, make sure to plug one drain while plunging the other to create a stronger suction.

Another mechanical tool is a drain snake, which is a long wire that is inserted into the drain to break up and remove the blockage. You can purchase a drain snake at your local hardware store or rent one from a home improvement center.

Natural and Eco-Friendly Solutions

If you prefer to use natural and eco-friendly solutions, there are a few options available. One of the most popular methods involves using baking soda and vinegar.

Simply pour a cup of baking soda down the drain, followed by a cup of white vinegar. Let the mixture sit for about 30 minutes, then flush the drain with hot water.

Another natural solution involves pouring a cup of salt down the drain, followed by a cup of baking soda and a cup of vinegar. Let the mixture sit for about 30 minutes, then flush the drain with hot water.

When to Call a Professional Plumber

If you’ve tried the above methods and still can’t unclog the drain, it may be time to call a professional plumber.

A licensed plumber like Plumber Warragul, have the tools and expertise to fix a blocked drain. They can handle issues like tree roots or mineral deposits.

It’s also important to call a professional if you notice gurgling noises or foul odors coming from the drain. This could be a sign of a more serious issue.

Additionally, if you’re dealing with a foreign object or water-soluble substance in the drain, it’s best to leave it to the experts. This will help you avoid causing further damage.

There are many techniques and tools available to help you unclog drains. Whether you prefer natural remedies or mechanical tools, it’s important to take the necessary precautions and protect yourself from corrosion and other hazards.

Do Colored Gutters Cost More? Exploring the Price Differences Between Colored and Standard GuttersDo Colored Gutters Cost More? Exploring the Price Differences Between Colored and Standard Gutters

If you’re in the process of replacing or installing new gutters, you may be wondering whether colored gutters cost more than standard white gutters. The answer is that it depends on a few factors.

In general, colored gutters do tend to cost more than white gutters, but the price difference may not be significant enough to sway your decision. Let us go through this with Gutter Cleaning near me.

a newly-painted gutters

One factor that can affect the cost of colored gutters is the material they are made from.

For example, aluminum and zinc gutters are difficult to paint and come in a limited variety of colors, but they do offer benefits when it comes to durability, often lasting 25 years or more.

Aluminum gutters cost an average of $7.50 per linear foot, while zinc is much more expensive, averaging $27.50 a linear foot.

On the other hand, vinyl gutters are easy to paint and come in a wide variety of colors, making them a more affordable option for colored gutters. The average cost of vinyl gutters is around $3 to $5 per linear foot.

Another factor to consider is the aesthetic value of colored gutters.

While white gutters are a classic and timeless choice, colored gutters can add a pop of personality to your home’s exterior.

If you’re looking to boost your home’s curb appeal, colored gutters may be worth the extra cost.

Ultimately, the decision to choose colored gutters over white gutters will depend on your personal preferences and budget.

Factors Influencing Gutter Pricing

When it comes to gutter pricing, there are several factors that can influence the cost. Understanding these factors can help you make informed decisions about which gutters to choose for your home and budget. Here are some of the key factors to consider:

Material Costs and Types of Gutters

One of the biggest factors that can impact the cost of gutters is the material they are made from.

Common gutter materials include aluminum, steel, vinyl, and copper. Each material has its own unique properties and price points, so it’s important to consider which one will best suit your needs and budget.

Aluminum gutters are a popular choice because they are lightweight, durable, and relatively inexpensive.

Steel gutters are also durable, but they tend to be heavier and more expensive than aluminum.

Vinyl gutters are the most affordable option, but they may not be as durable as other materials.

Copper gutters are the most expensive option, but they are also the most durable and can last for decades.

Colour Selection and Customisation

Another factor that can impact the cost of gutters is the colour selection and customisation options.

While traditional white gutters are the most affordable option, coloured gutters can add a unique touch to your home’s exterior.

Some gutter companies offer custom paint colours to match your home’s existing colour palette, which can be a great option if you’re looking for a seamless look.

However, keep in mind that custom colours and finishes can add to the overall cost of your gutters. If you’re on a tight budget, it may be best to stick with standard colours and finishes.

Installation and Maintenance Considerations

Finally, the cost of gutter installation and maintenance should also be taken into consideration.

While some homeowners may choose to install gutters themselves to save money, it’s important to note that improper installation can lead to costly repairs down the line.

Hiring a professional, see Gutter Cleaning near me, to install your gutters can ensure that they are installed correctly and function properly.

Additionally, regular maintenance is essential for keeping your gutters in good condition and preventing damage to your home.

This can include cleaning out debris, checking for leaks, and repairing any damage as needed.

While regular maintenance can add to the overall cost of your gutters, it can also help extend their lifespan and prevent costly repairs in the future.

Impact of Gutter Colour on Home Aesthetics

When it comes to choosing the right gutter colour for your home, it’s important to consider how it will impact the overall aesthetics of your property. Here are a few things to keep in mind:

Matching Gutters with Exterior Design

Your gutters should complement the overall design of your home’s exterior. This includes the siding, trim, and roof.

Consider the architectural style of your home and choose a gutter colour that will blend in seamlessly or provide a nice contrast.

Colour Durability and Climate Factors

The durability of your gutter colour is also important. Depending on the climate and weather conditions in your area, certain colours may be more prone to fading, rusting, or staining.

It’s important to choose a colour that will hold up well over time. This way, it won’t require frequent repainting or maintenance.

Some colours may also be more suitable for certain climates. For example, lighter colours may be better for homes in hot, sunny areas as they reflect heat and sunlight. Meanwhile, darker colours may be better for homes in cooler climates as they absorb heat.

Overall, the right gutter colour can have a significant impact on the curb appeal and aesthetic appeal of your home. By considering factors such as architectural style, colour durability, and climate factors, you can choose a gutter colour that will complement your home’s exterior. It will also provide long-lasting beauty and protection.